How to Transfer Assets Between FameEX Users? (App)
2026-09-16 03:56:551. What Is FameEX Internal Transfer?
FameEX Internal Transfer allows you to transfer digital assets directly to another FameEX user. You can use the recipient's email address, mobile number, or UID linked to their FameEX account to send assets.
Unlike an on-chain withdrawal, an internal transfer does not require a blockchain deposit address or withdrawal network. Internal transfers between FameEX users also have no withdrawal fees.
2. What Should I Know Before Making an Internal Transfer?
Before making an internal transfer, your FameEX account must have at least two security verification methods enabled. These may include email verification, mobile verification, or Google Authenticator. You should also confirm that the recipient is a FameEX user. Make sure you have the correct email address, mobile number, or UID linked to their account.
FameEX identifies the recipient based on the account information you enter. Always check the recipient details and transfer amount carefully before submitting the request. Incorrect recipient information may result in assets being transferred to the wrong account.
3. How to Make Internal Transfer on FameEX?
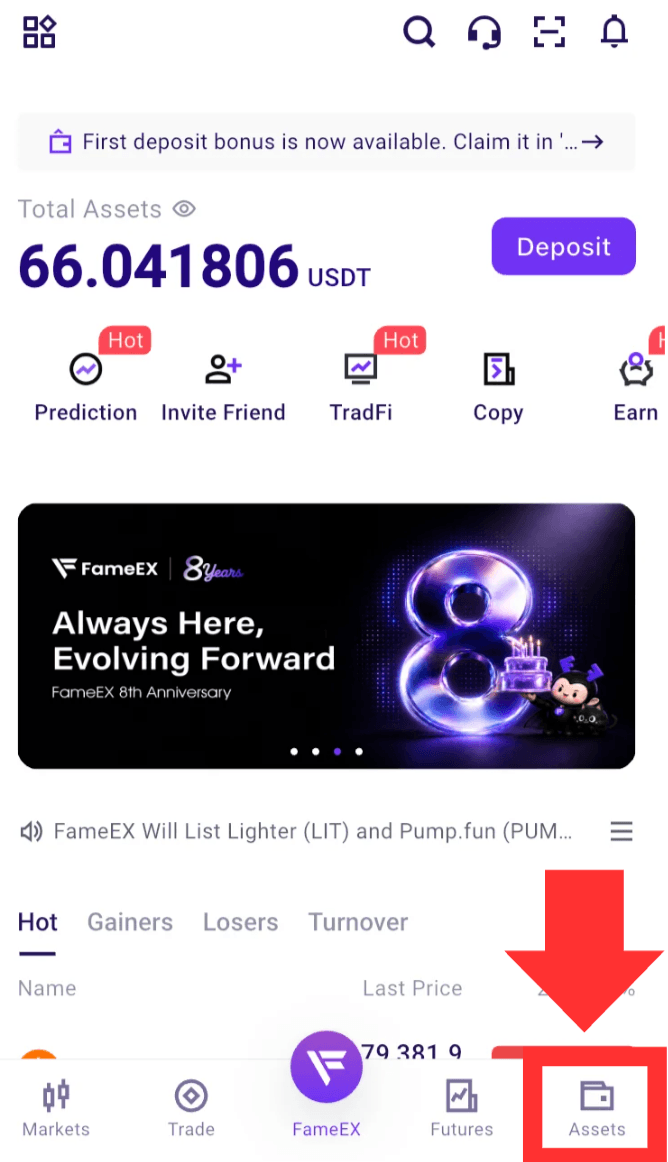
1) Open the FameEX App and log in to your account. Tap [Assets] at the bottom to enter the Assets page.
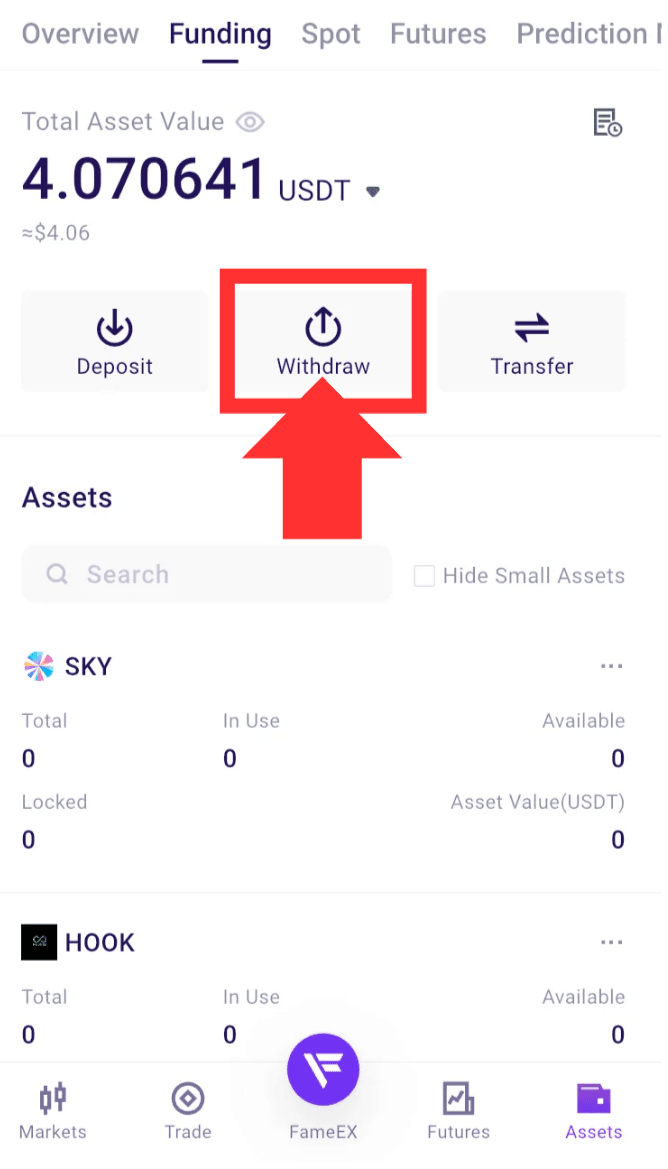
2) On the Assets page, click [Withdraw] to enter.
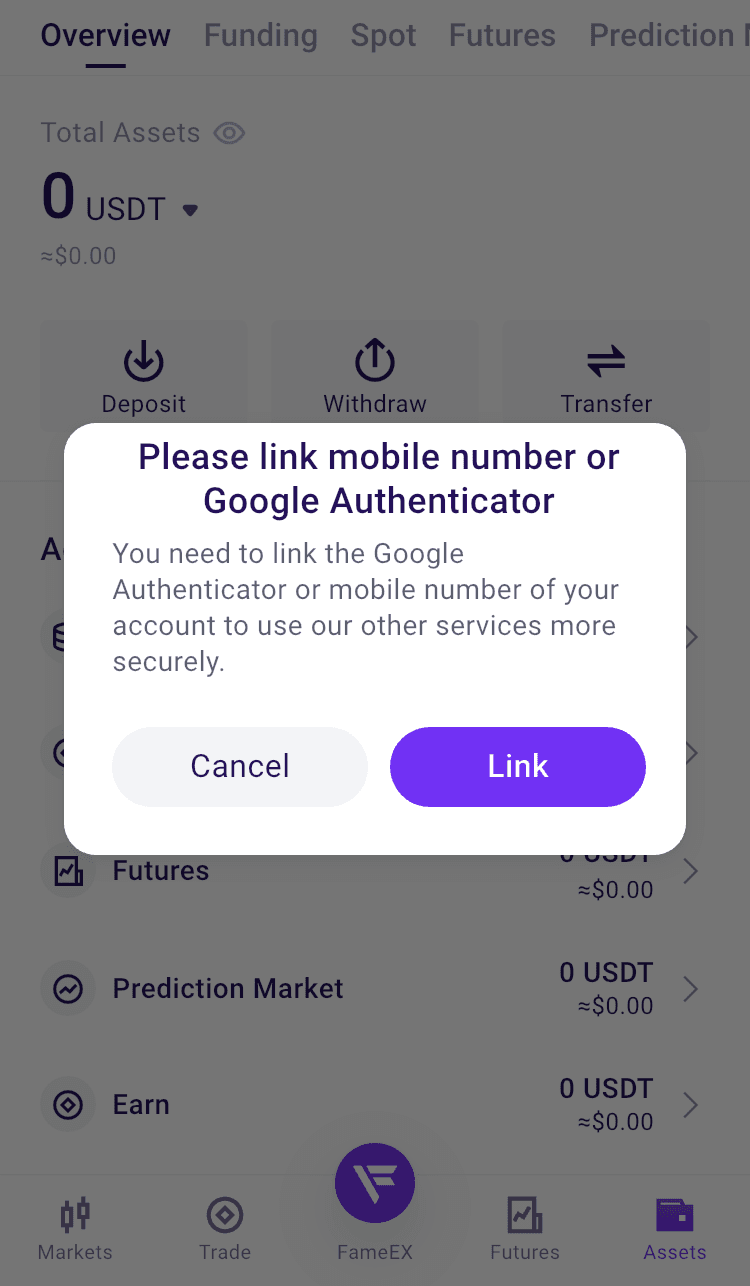
3) If your account has not completed the required security setup for withdrawals, follow the page instructions to complete it first. You must set up at least two security verification methods before proceeding.
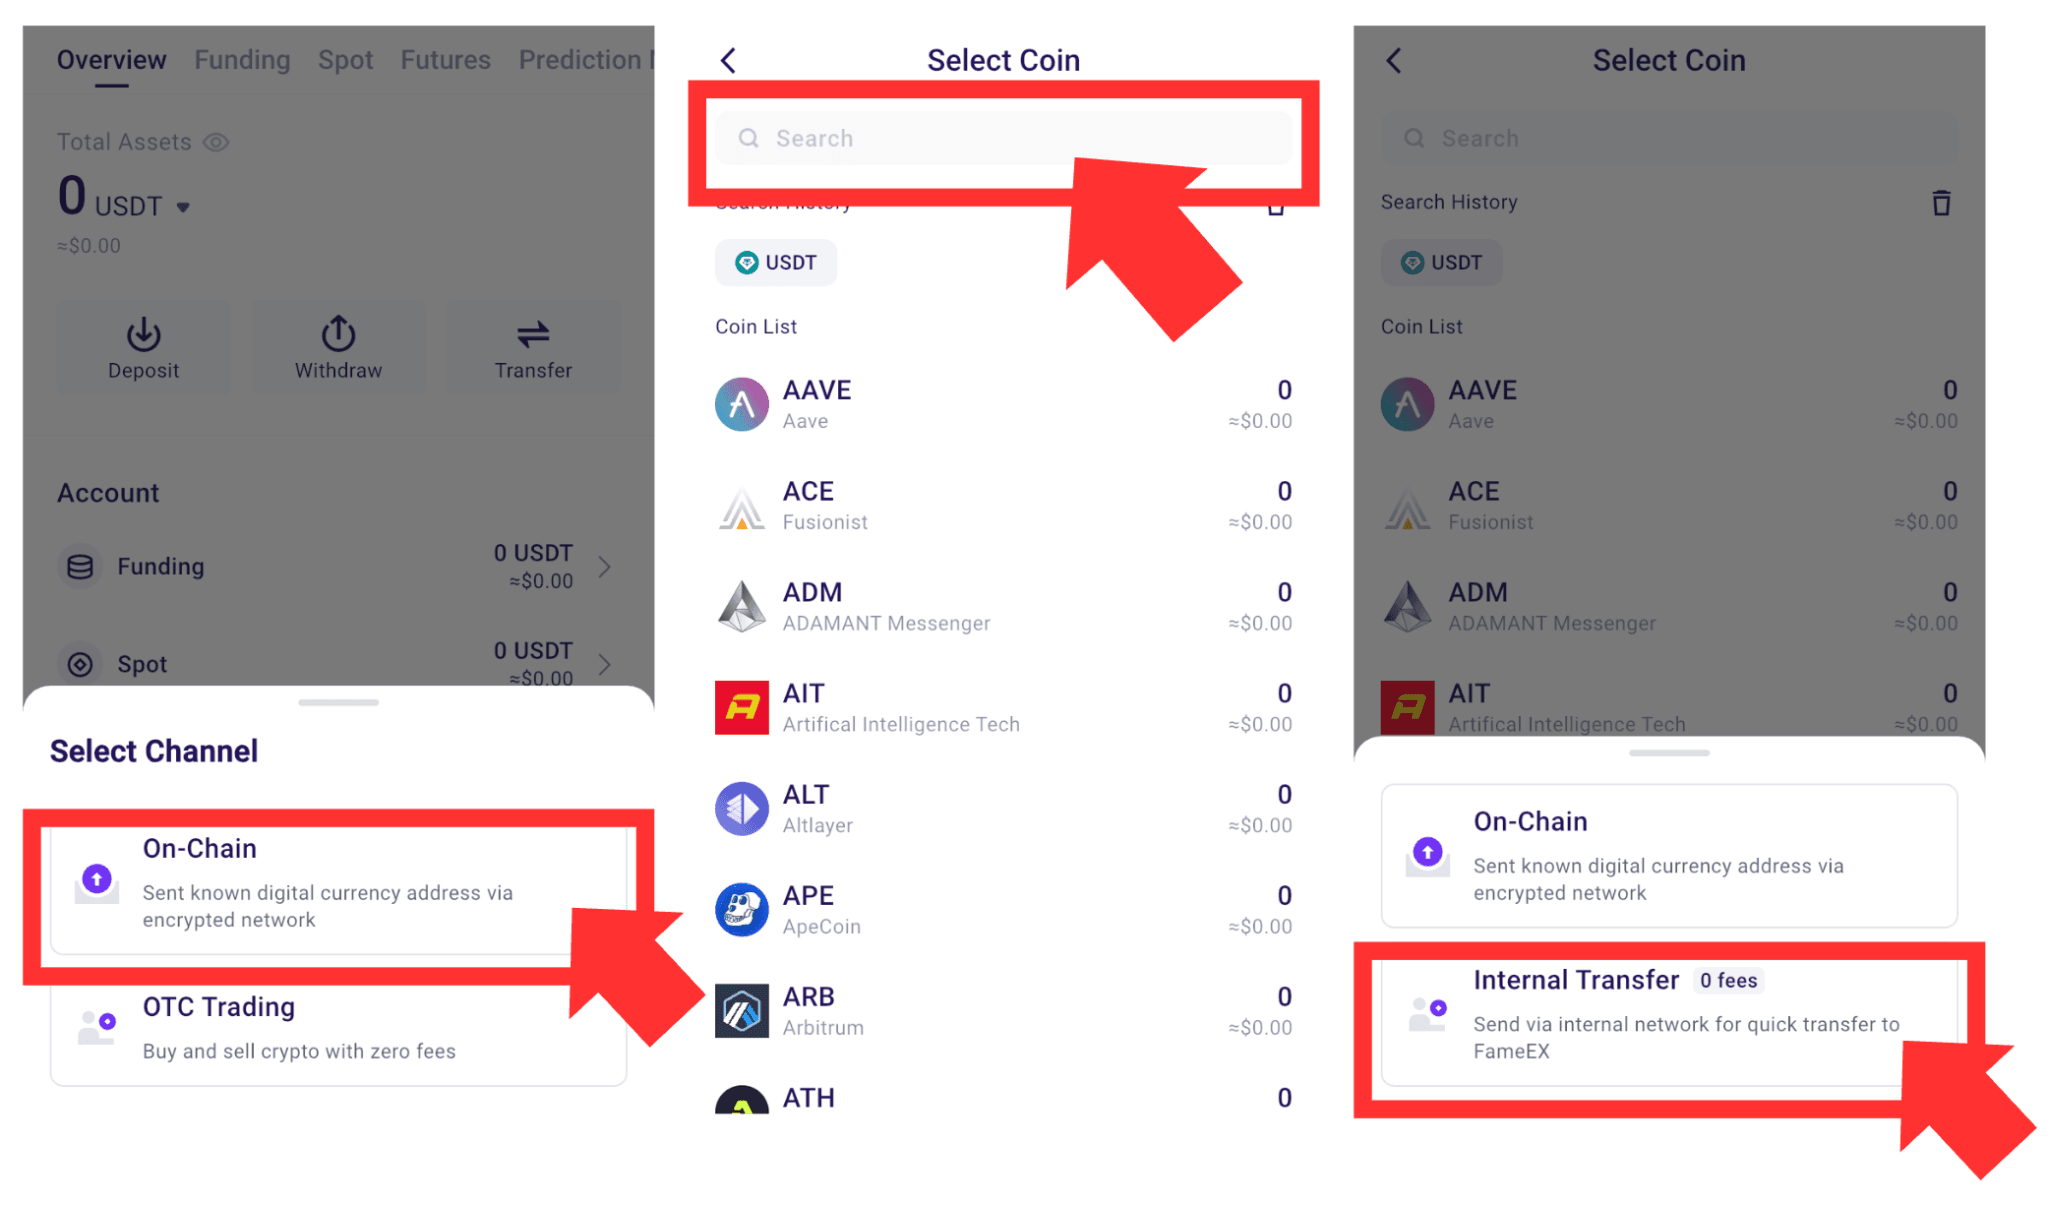
4) After completing the security verification setup, return to the withdrawal page. Under [Select Channel], tap [On-Chain] and select the coin you want to transfer. After entering the withdrawal page for the selected asset, tap [Internal Transfer] to switch the transfer method.
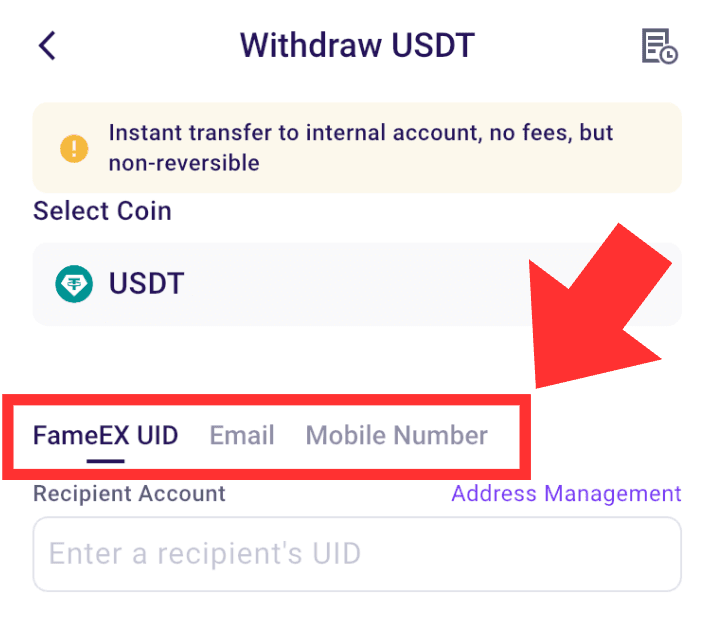
5) Based on the recipient’s account information, select UID, email, or mobile number, then enter the corresponding FameEX account details.
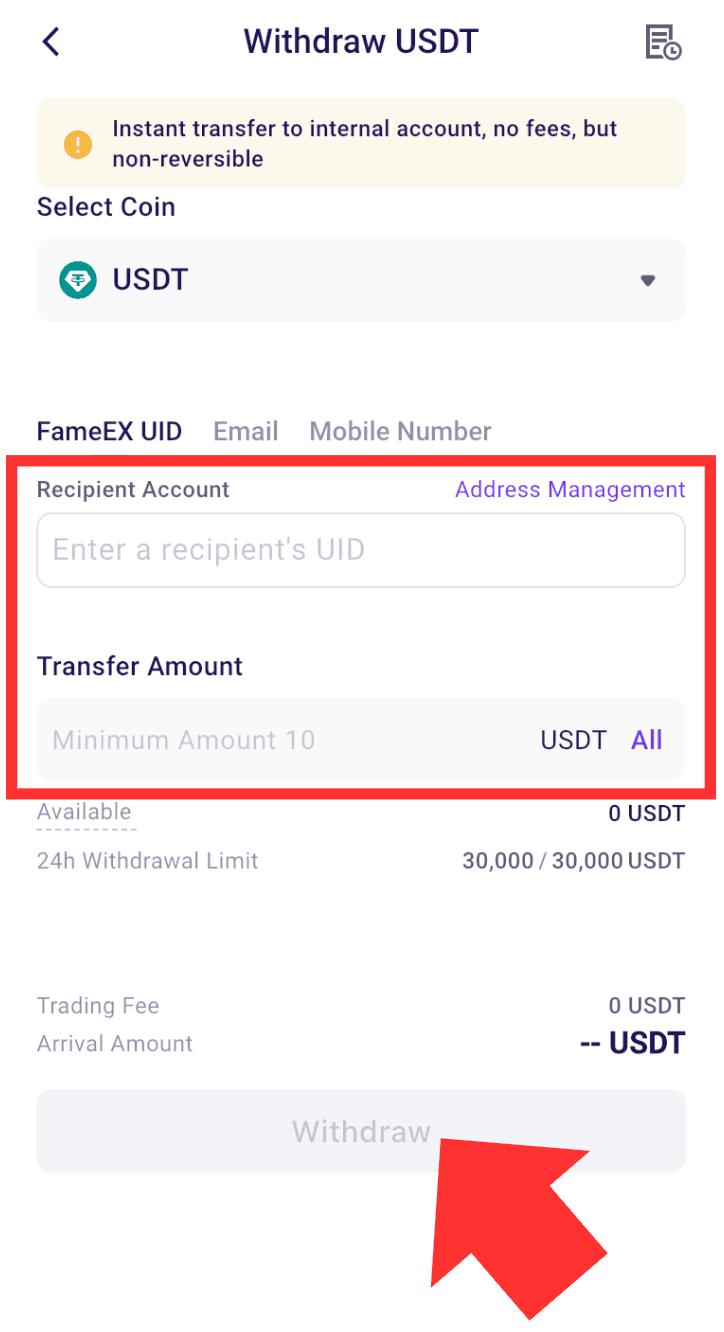
6) Enter the amount you want to transfer. Review the asset, recipient account, and transfer amount carefully. Once all details are correct, click [Withdraw] to submit the request.
7) Complete the required security verification if it pops up. Once the request has been successfully submitted, you can check its status in your withdrawal records. Some transfers may be subject to additional review due to account security or risk control requirements. Please refer to the information shown on the page or official FameEX notifications for the latest status.
4. How to Check Internal Transfer Records?
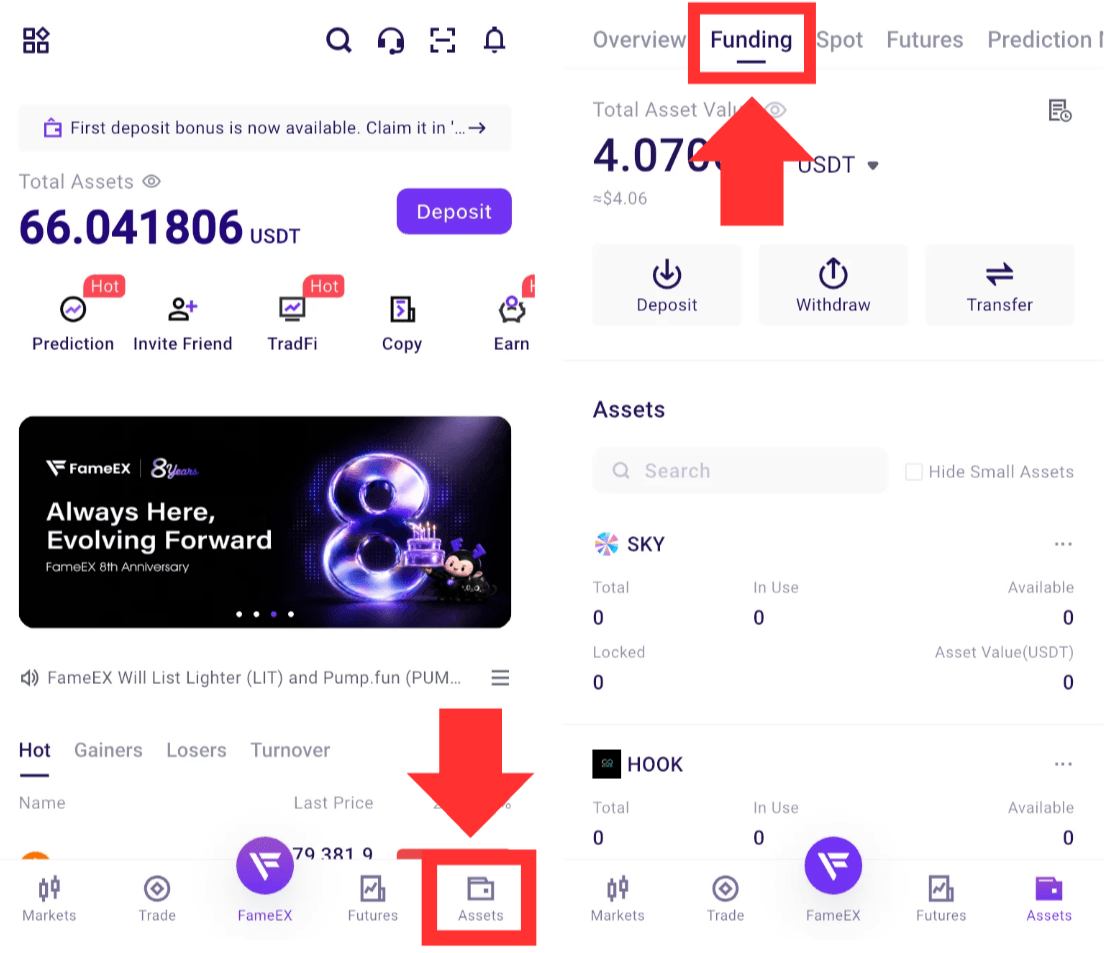
1) After completing the withdrawal, go to the [Assets] page and tap [Funding] at the top.
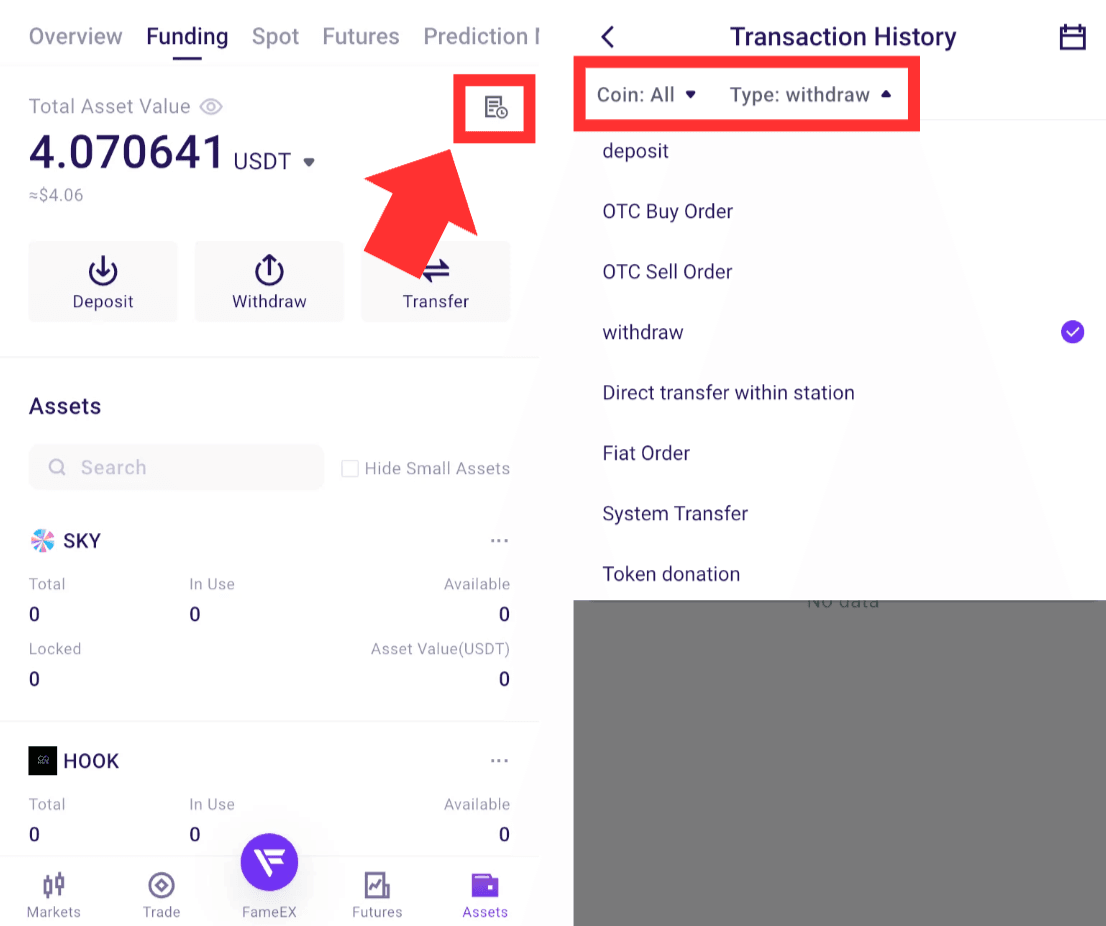
2) Tap the [Transaction History] icon in the upper-right corner to enter the records page. Under [Transaction History], select [Withdraw] as the type to view your withdrawal records.
Notes
- Before making a withdrawal or internal transfer, your FameEX account must have at least two security verification methods enabled.
- Internal Transfer is only available for asset transfers between FameEX users. To send assets to another platform or an external wallet, please use [On-Chain Withdrawal]. For a more detailed guide, please refer to “How to Withdraw Crypto on FameEX? (Web)” or “How to Withdraw Crypto on FameEX? (App)”
- FameEX Internal Transfer supports recipient accounts identified by email address, mobile number, or UID.
- Always check the asset, recipient account, and transfer amount before submitting the request. Incorrect account information may result in assets being transferred to the wrong account.
- Internal transfers between FameEX users have no withdrawal fee.
- Available assets, transfer amounts, and applicable limits are subject to the information shown on the Internal Transfer page.
*Feature names and page locations may change with platform updates. Please refer to the actual interface for the latest information.